Working with Milestones
Milestones allow you to track progress across test runs and manage high-level deliverables, such as release versions or sprint cycles.
Milestones help you to group related manual runs and automation runs under a common goal, ee test coverage, ensure requirements coverage, maintain traceability and manage releases. You can set start and due dates to track timelines and progress, and view an overview of results. Close milestones and their linked runs to freeze results. If you have an issue tracker set up for your project, you can also view created defects across all runs and the requirements covered by the milestone.
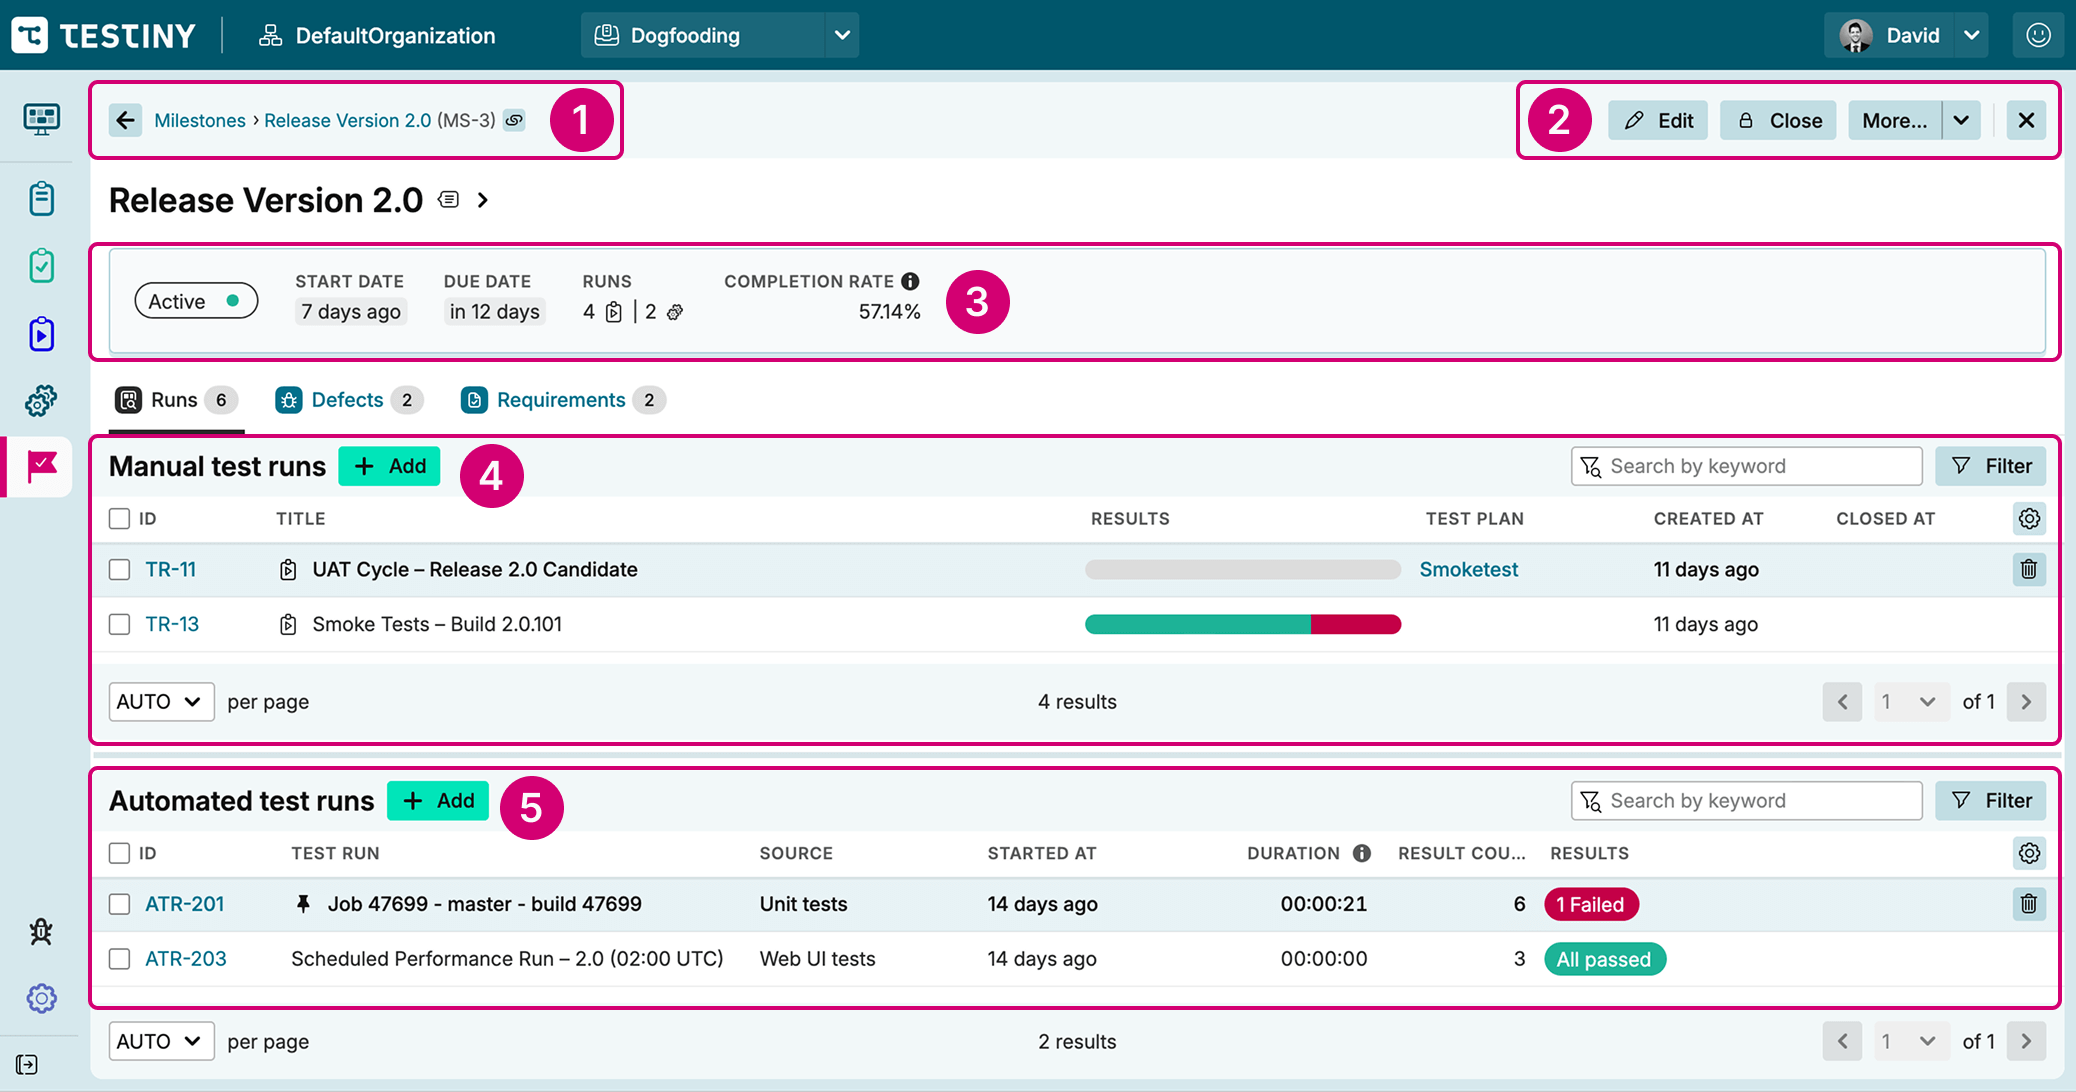
The main elements in the screenshot above are:
- Breadcrumb/navigation area is used to return to the milestone list.
- The tool bar allows general actions you can perform on the current milestone.
- The details panel displays key information about the milestone, such as status, due date, and completion rate.
- The manual test run list displays all manual test runs currently added to the milestone.
- The automated test run list shows all automated test runs currently added to the milestone.
Creating and Editing Milestones
You can create and assemble a milestone directly from the milstones view.
To do so, follow these steps:
- Click the
Createbutton above the list of milestones in the upper left corner or from the empty state view. - Enter a title for the milestone
- Add a start date, a due date and a description (optional)
- Confirm by clicking
Create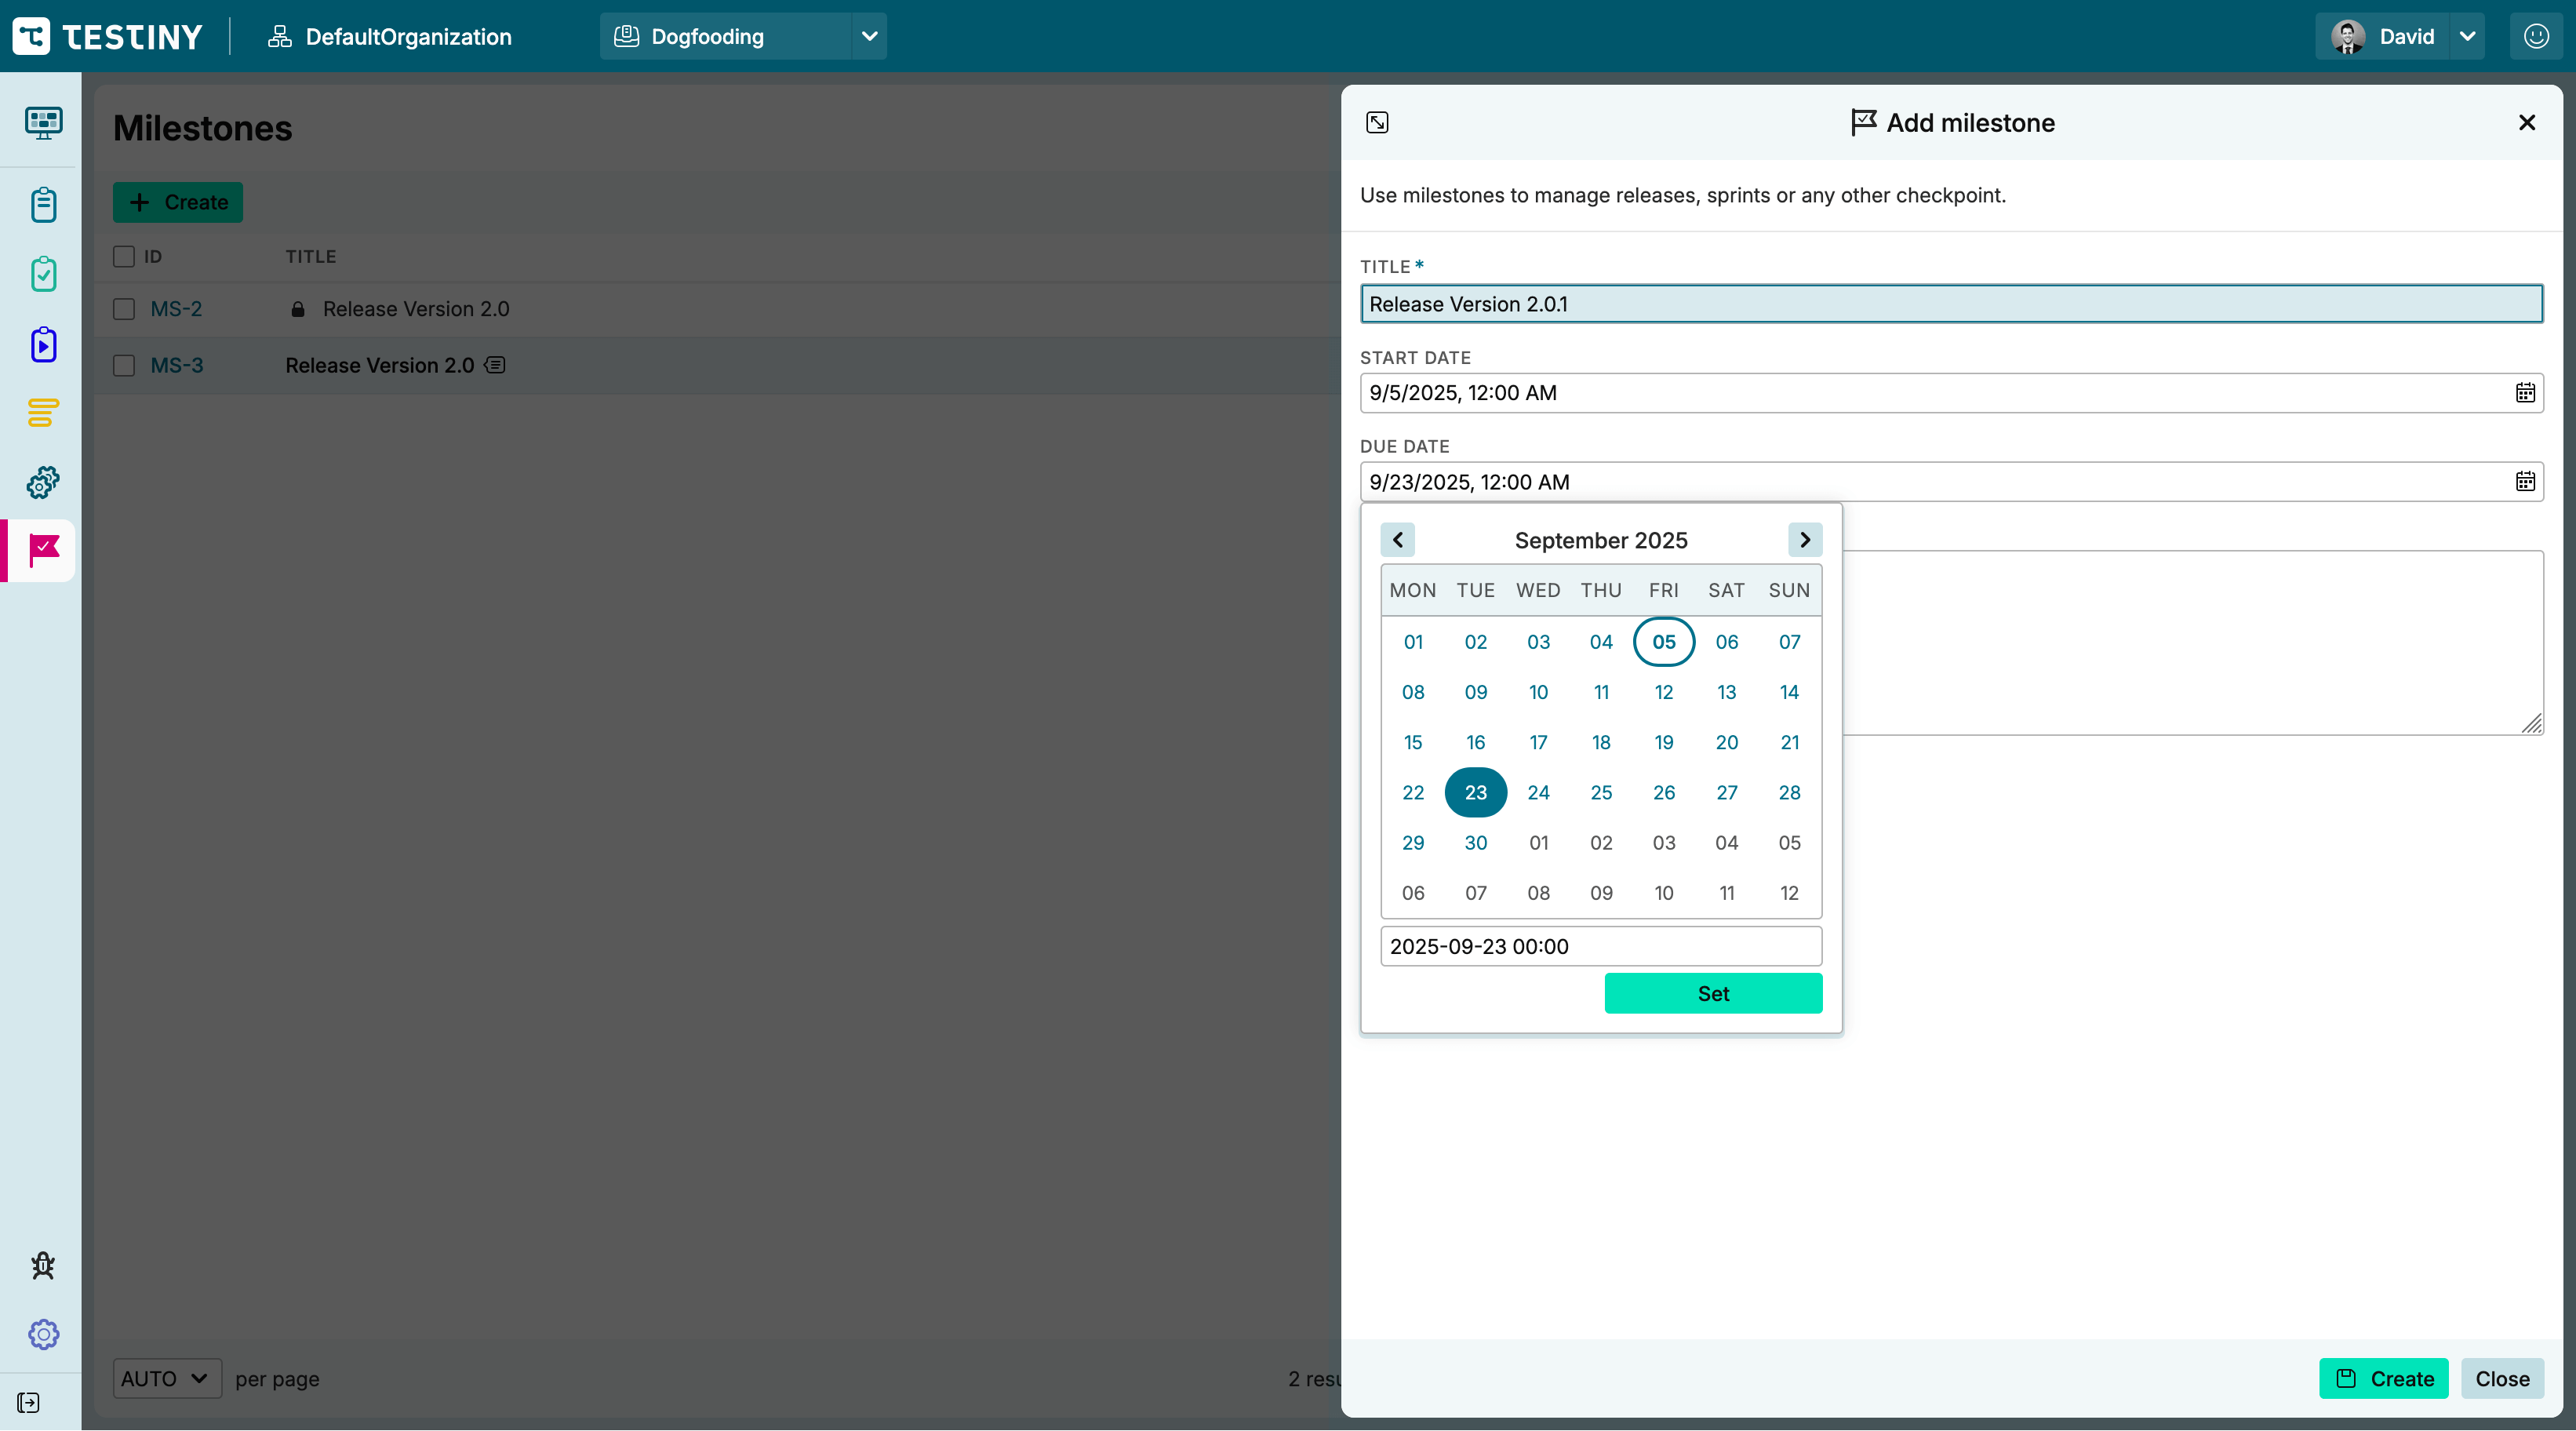
You can also edit an existing milestone by following these steps:
- Click the
Editbutton above the list of milestones in the upper right corner
- Edit the title of the milestone, the start date, due date and description (optional)
- Confirm by clicking
Save - Alternatively, to dismiss the changes, click
Closeand chooseDiscardin the dialog.
The milestone also has a history that records all changes, including edits.
Adding Runs
- Click the
+ Addbutton next to the Manual test runs to add test runs to the milestone and the Add test runs to milestones panel will open
 - Select the test run you’d like to add to the milestone and confirm with the
AddorAdd & Nextbutton - The selected test runs have been added to the milestone
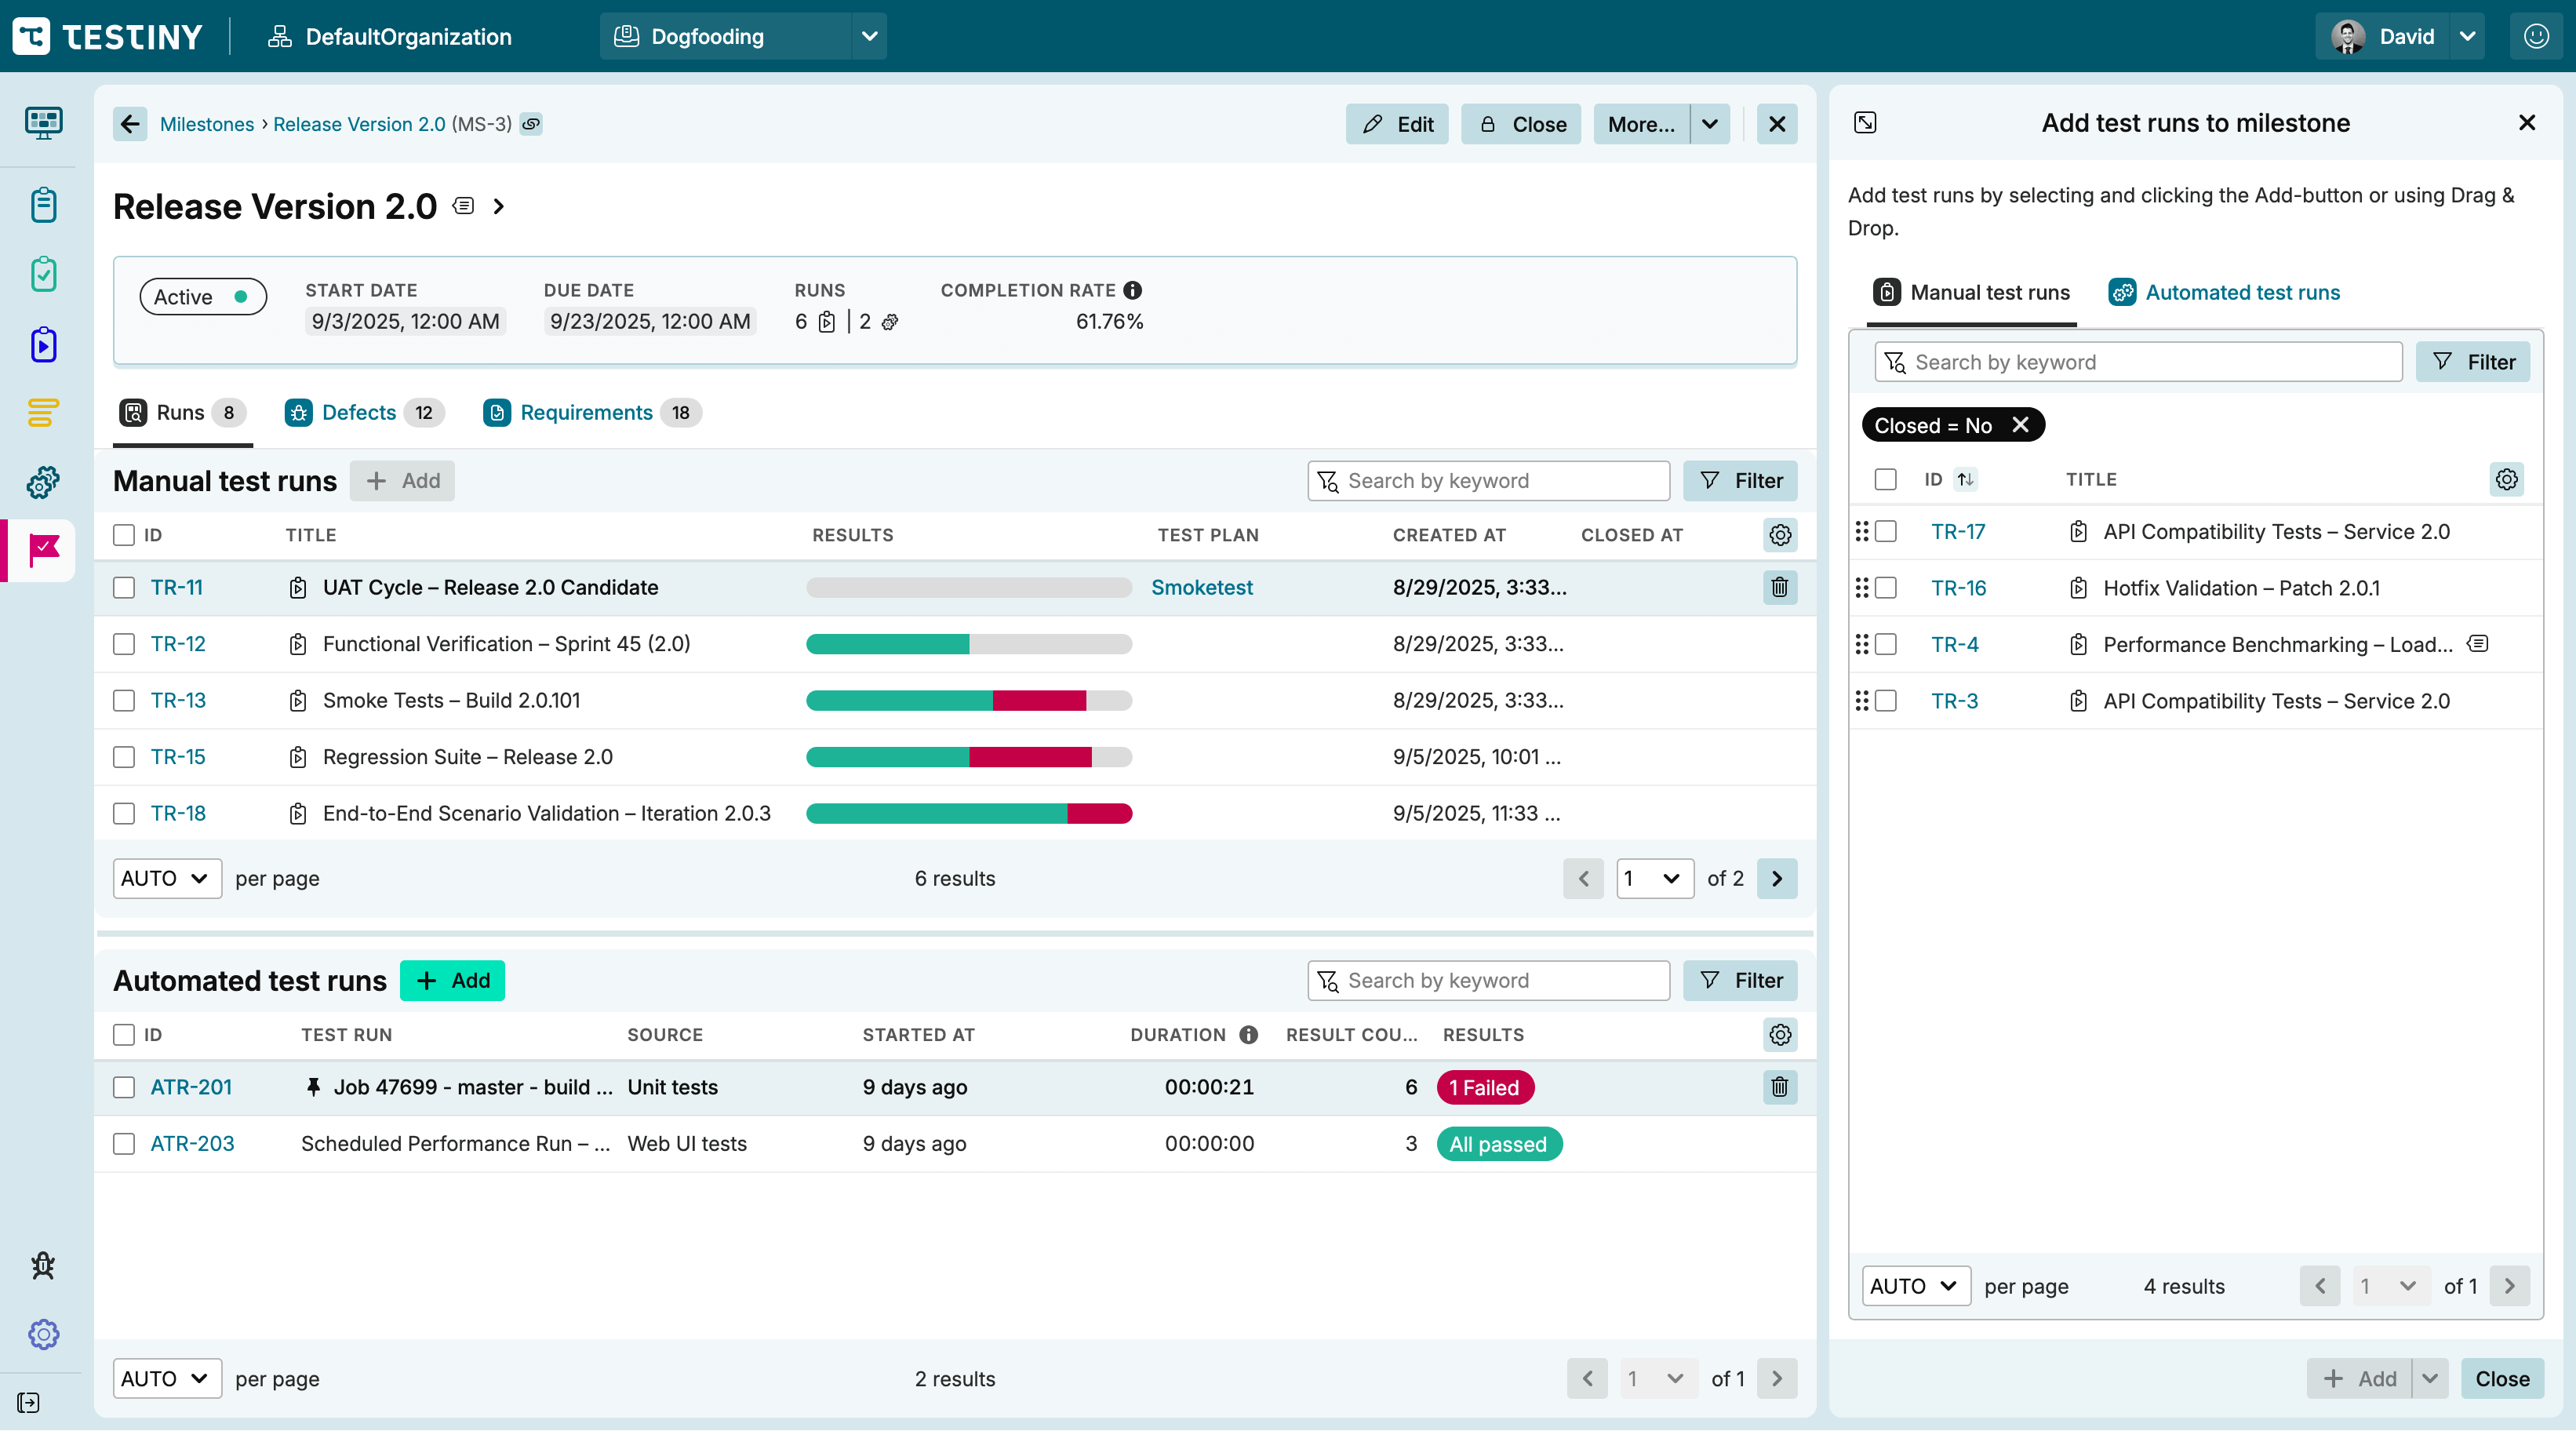
The same procedure is available for automated test runs:
- Click the
+ Addbutton next to the Automated test runs to add test runs to the milestone and the Add test runs to milestones panel will open
 - Alternatively, when you're already in the process of adding manual test runs, you can also click on the second tab Automated test runs in the panel to switch to the automated test runs list
- Select the test run you’d like to add to the milestone and confirm with the
AddorAdd & Nextbutton - The selected test runs have been added to the milestone
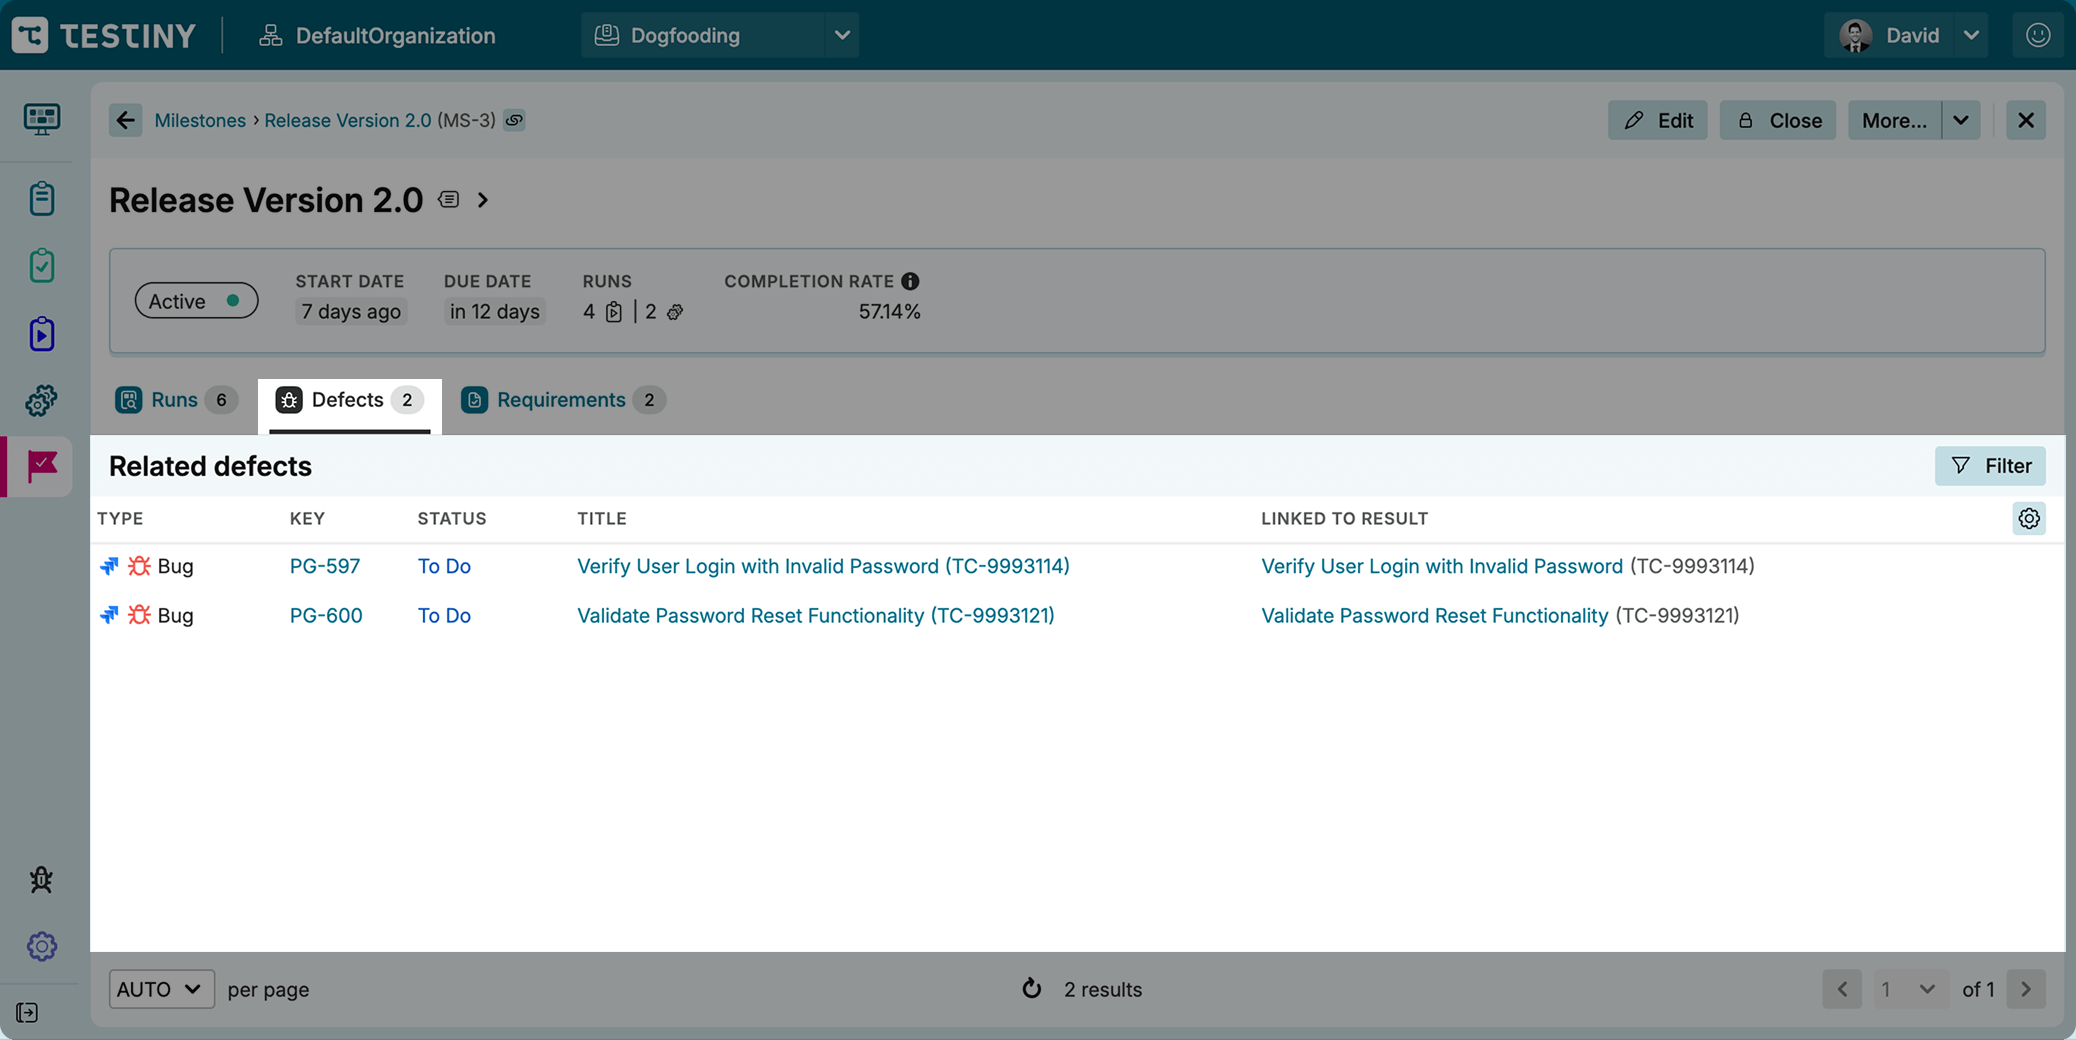
Defects & Requirements Analysis
In the Defects view, see all defects associated with the test runs. This summary of defects gives insight into the quality of the release or product and supports priorization of fixes. Track the current status of all defects at once to see if they are still in progress or already resolved.
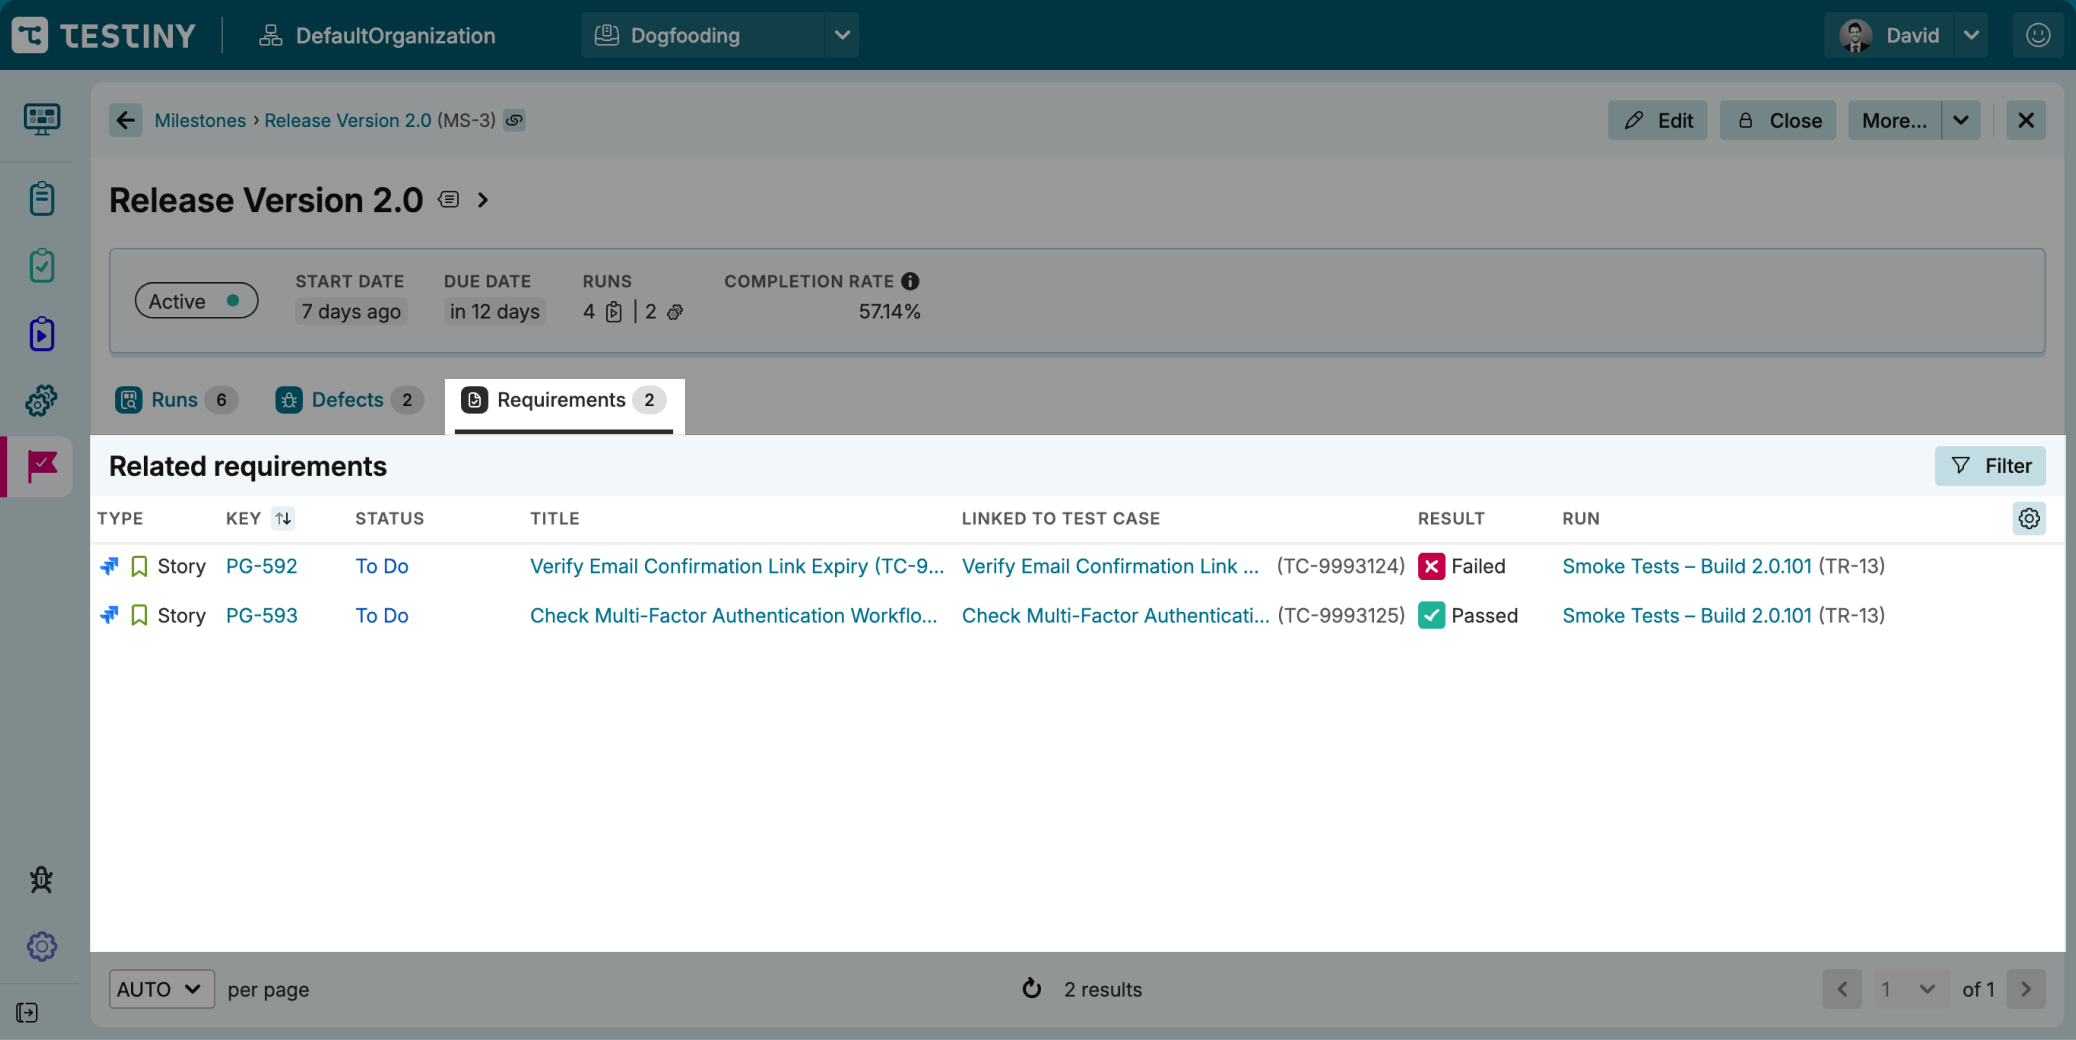
In the Requirements view, see all requirements that are linked to the test cases in the test runs. The list of requirements defines the scope of the milestone, ensuring that all planned functionality is accounted for and can be traced to specific test cases. This requirements traceability matrix enables you to monitor requirements coverage, manage risks by focusing on critical requirements and identify broken requirements to support decisions.
Closing Milestones
To close a milestone, click the Close button at the top of the milestone view.
You can find the action Close also in the menu ![]() . When you close a milestone, all added test runs are also closed and cannot be re-opened or deleted while the milestone remains closed.
. When you close a milestone, all added test runs are also closed and cannot be re-opened or deleted while the milestone remains closed.
If needed, you can re-open a milestone to make changes or adjustments. The associated test runs, however, remain closed.
Requirements of test cases in linked runs may be updated.